Securely Deploy Ghost Behind a Cloudflare Tunnel (Docker Setup Guide)
This guide outlines a clean and secure method for deploying a self-hosted Ghost publishing platform using Docker, with external access handled through a secure tunnel. The approach avoids exposing ports directly to the internet while keeping the deployment simple and maintainable.
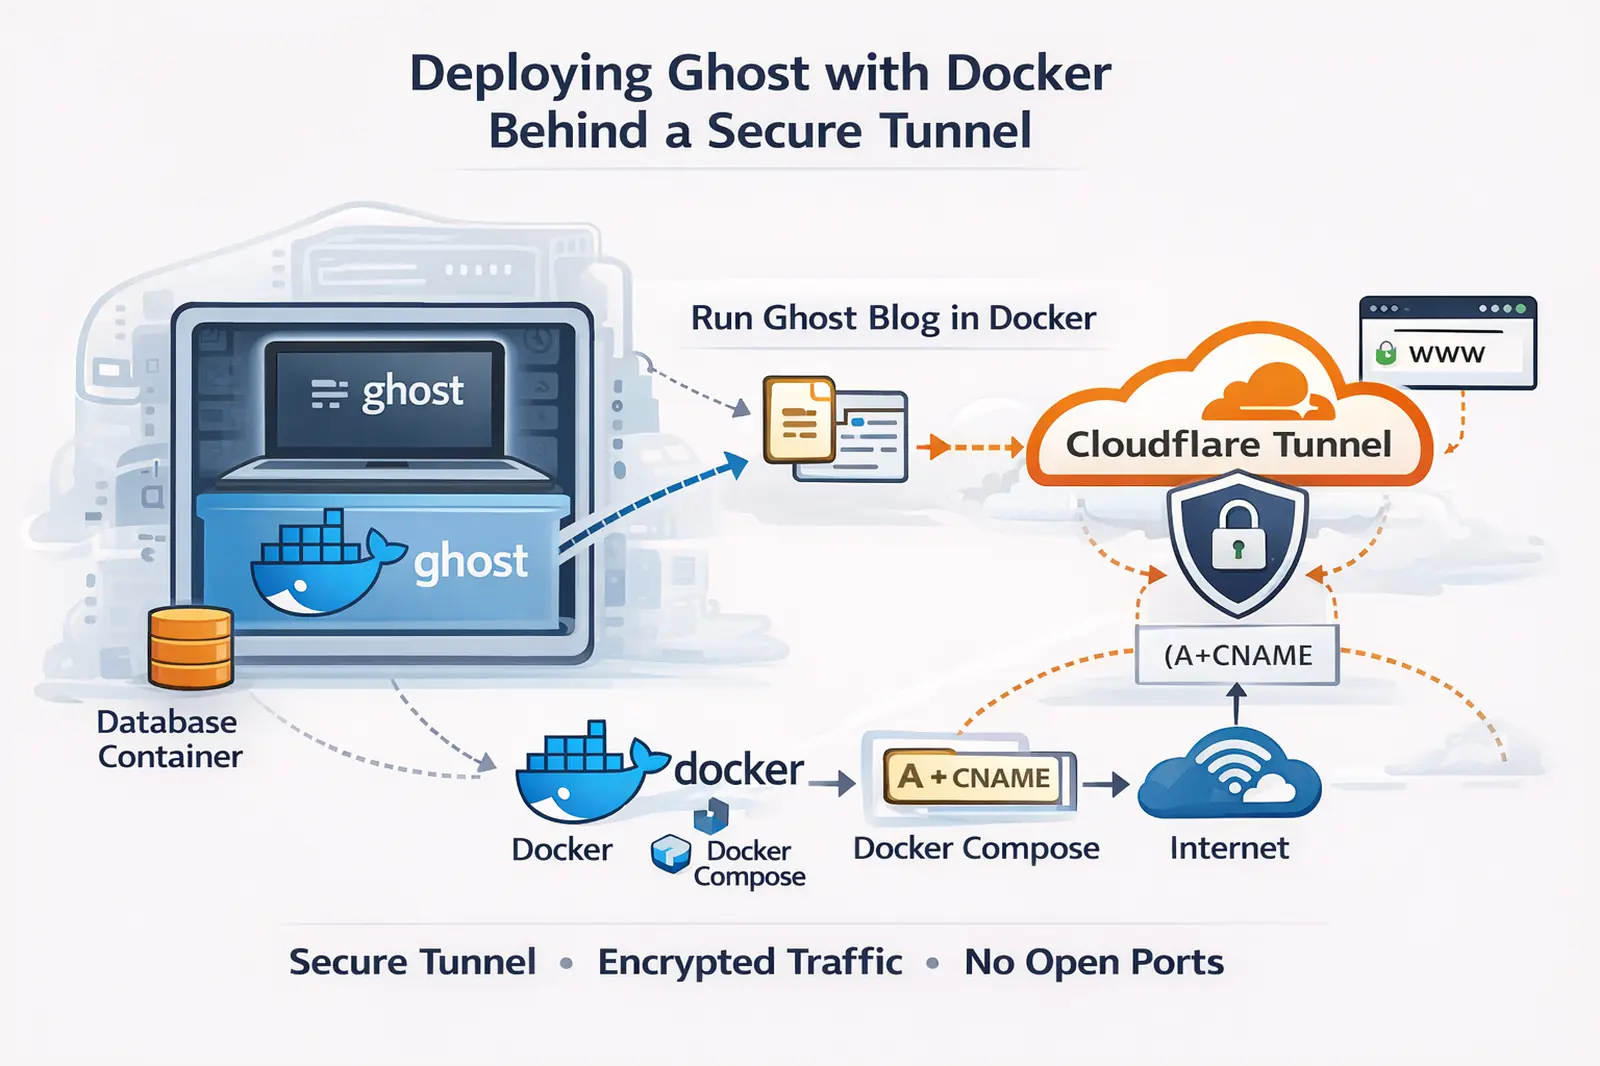
Architecture Overview
The deployment consists of three core components:
- A containerized Ghost application
- A lightweight database (or default embedded database)
- A secure outbound tunnel that publishes the site without opening firewall ports
This design allows the blog to be accessible publicly while the host system remains protected from direct inbound connections.
Prerequisites
Before deployment, ensure the following are in place:
- A Linux-based host with Docker installed
- A domain name managed through a DNS provider
- A tunnel service configured to route a subdomain to the local Ghost service
- Basic familiarity with Docker or a container management UI
Step 1: Create Persistent Storage
To ensure content and configuration persist across container restarts, create directories on the host system:
mkdir -p /path/to/ghost/content
This directory will store themes, images, and configuration data.
Step 2: Deploy the Ghost Container
A standard Docker configuration can be used to deploy Ghost. Below is a minimal example:
version: '3.8'
services:
ghost:
image: ghost:latest
container_name: ghost-blog
restart: always
ports:
- "2368:2368"
volumes:
- /path/to/ghost/content:/var/lib/ghost/content
environment:
url: https://yourdomain.com
NODE_ENV: production
Key points:
- Port 2368 is used internally for Ghost
- The url variable must match your public domain
- Content is stored outside the container for persistence
Step 3: Start the Container
From the directory containing your docker-compose.yml:
docker compose up -d
Once running, Ghost will be available locally at:
Step 4: Configure the Tunnel
Instead of exposing port 2368 to the internet, a secure tunnel is used:
- The tunnel agent runs on the same host as the Ghost container
- It forwards requests from a public subdomain to:
No inbound firewall rules or port forwarding are required
After configuration, your site becomes accessible at:
Step 5: Initial Setup
Access the Ghost admin panel by navigating to:
Complete the setup process:
- Create an admin account
- Configure site title and branding
- Adjust general settings
Optional: Database Configuration
For small deployments, Ghost’s default database is sufficient. For more advanced setups, an external database can be configured:
- MySQL or MariaDB container
- Environment variables updated in Docker configuration
This allows better scalability and backup control.
Security Considerations
This deployment model provides several security advantages:
- No direct exposure of application ports
- All traffic routed through a secure tunnel
- TLS encryption handled at the edge
- Optional authentication layers before access
Additionally, administrative access can be restricted further using private networking or access policies.
Maintenance and Updates
To update Ghost:
docker compose pull
docker compose up -d
Because content is stored outside the container, updates do not affect your data.
Conclusion
Running Ghost in Docker behind a secure tunnel offers a reliable and low-maintenance publishing platform. It eliminates the need for traditional port forwarding while maintaining full control over your infrastructure.
This approach is well-suited for self-hosted environments where security, simplicity, and flexibility are priorities.